Upgrading the RAM and Adding an SSD to the Atari VCS 800
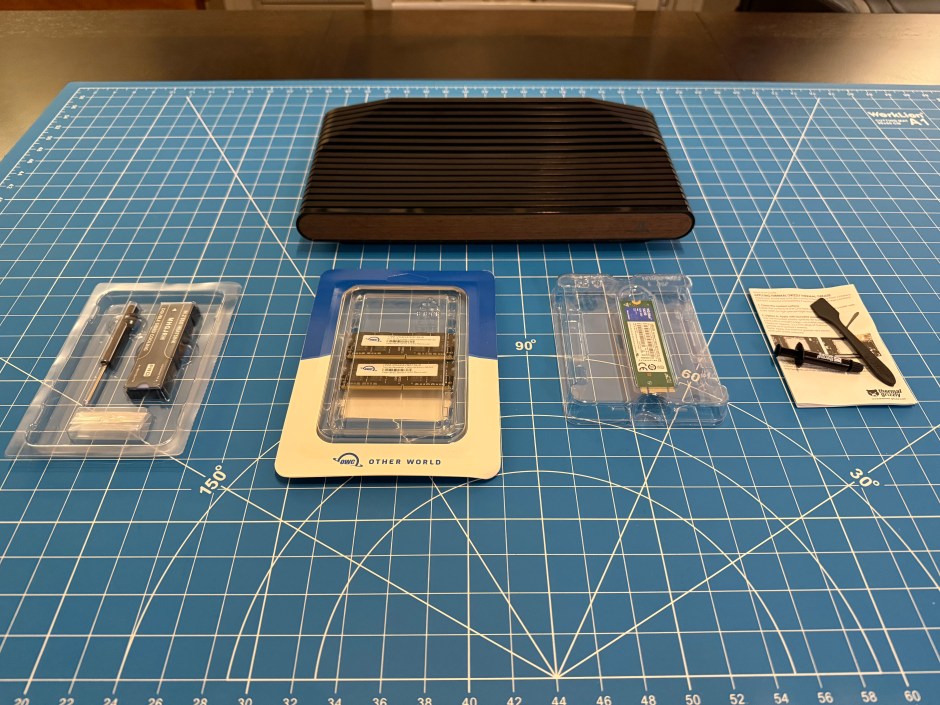
Upgrading the RAM and adding an SSD to your Atari VCS 800 will greatly improve the performance of the entire system, no matter what you plan on doing with it. Even more so if you swap out the thermal pad Atari uses and replace it with some good thermal paste for the CPU/GPU. If you have experience with building PCs, these upgrades should be straightforward. However, there are a few quirks with the Atari VCS 800 that you will need to be aware of, so I’ve created this reference and checklist.
Before digging into the hardware itself, there several items necessary for this upgrade.
You will need to have:
- An Atari VCS 800 system1
- A wired keyboard, or non-Bluetooth wireless keyboard
- A USB Flash Drive
- Phillips and T10 Torx screwdrivers
- Thermal paste
In my case, I used some Thermal Grizzly paste2 and it’s working very well so far. - Two modules of DDR4-2400 SODIMM RAM, with a maximum of 16GB per module
In my case, two 16GB modules from OWC3 for a total of 32GB. - An M.2 SATA SSD, but not an M.2 NVMe SSD
In my case, a Western Digital 250GB Blue M.2 SATA SSD4. I plan on using my Atari VCS 800 most often with Batocera for retro gaming, so 250GB will be plenty of space.
- It is very important to note that M.2 NVMe SSDs are not compatible with the Atari VCS 800 – it must be an M.2 SATA SSD.
To prepare for the upgrade, you will need:
- The latest version of Atari OS – downloadable here
- To write that downloaded Atari OS to the USB Flash Drive, following the instructions here
- To connect the Atari VCS 800 to a TV/monitor, the keyboard and power – but leave the VCS turned off for now
Step 1: Remove the Supervisor password in the Atari VCS 800 BIOS and turn off Secure Boot
To avoid having to regularly enter Atari’s long password during the upgrades, it’s best to just remove it altogether.
- Turn the Atari VCS on and press the ESC key on the keyboard until you get to the BIOS screen
- From the BIOS menu, select “Setup Utility“
- From the Setup Utility, go the the Security menu and select “Set Supervisor Password“
- Enter the supervisor password (Old Password), and then leave both New Password fields blank
Most versions of the Atari VCS 800 should have a default supervisor password of: Atar!C3l3br8te$50Ye4r$
Some older versions may have a default supervisor password of: Piano18482 - Press the F10 key on the keyboard to Save & Exit your changes, and reboot the Atari VCS 800
- While the system is rebooting, press the ESC key on the keyboard until you get to the BIOS screen
- From the BIOS menu, select “Enforce Secure Boot“
- From the Enforce Secure Boot menu, select “Disabled“
- Press the F10 key on the keyboard to Save & Exit your changes
- While the system is rebooting, press the ESC key on the keyboard until you get to the BIOS screen and then move to Step 2
Step 2: Flash update Atari OS on the VCS 800
- Plug the USB Flash Drive pre-written with the latest version of Atari OS into any USB port
- From the BIOS menu, select “Boot Manager“
- From the Boot Manager menu, select “Boot from USB Drive” – this will automatically cause the system to reboot from your USB Flash Drive
- When the system boots up, select “Flash Atari OS to eMMC” from the menu
- Follow the on-screen instructions and wait until the Atari OS update is successful
- Remove the USB Flash Drive and unplug the Atari VCS 800 from power and from the TV/monitor
We are now ready to open the Atari VCS 800 and upgrade the hardware
Step 3: Remove the rubber feet from the bottom of the VCS 800

Set the feet aside for now, we’ll reattach them later.
Step 4: Remove the front and rear panels from the VCS 800, remove the screws hidden by the rubber feet, and then set the system down with something in front it – but do not open the case until you read below!

Both front and rear panels snap on and off, but the ones on my system were pretty tight and I needed to use a thin shafted screwdriver to help pop them off. Then, take out the screws that were hidden by the rubber feet. Flip the system back over, and set it down – as it would sit normally – with something(s) stacked towards the front end of the Atari.
IMPORTANT: Do not lift the top half of the case from the bottom half going straight up, like the top half was a lid or cover!
The WiFi antennas in the Atari VCS 800 are extremely short and they are, unfortunately, attached to the top half of the case towards the front of the system. Literally everything else in the system is screwed into the bottom half of the case. If you do not lift the top half of the case from the bottom half in a specific way, there is a high risk of snapping the WiFi antennas from the internal WiFi card or worse. This can either be a pain to fix, or may require replacing the antenna and/or the WiFi card.
To avoid snapping the WiFi antennas, you will need to open the VCS 800 like a book or clamshell, from back-to-front, and where the front of the system is the hinge. I stacked several hardcover books on top of a cutting board, so that I was able to open the VCS 800 like an “L”, propping the top of the case against the books so I could access the WiFi card and remove it.
If you do end up snapping an antenna, it is not the end-of-the-world. If they break off the WiFi card, they may be reattached using your fingernail and a magnifying glass. If the antenna literally snapped, according to reports on the Atari VCS Discord channel, these antenna may be an alternative or replacement5.
Update – January 25, 2025
Step 5: Unscrew and remove the WiFi card, and set aside the top of the case

Step 6: Unscrew and remove the shielding from the motherboard

Step 7: Disconnect the cables for the front USB ports from the motherboard


Step 8: Unscrew the motherboard from the bottom of the case

Step 9: Remove the motherboard from the case and flip it over to access the RAM slots on the bottom
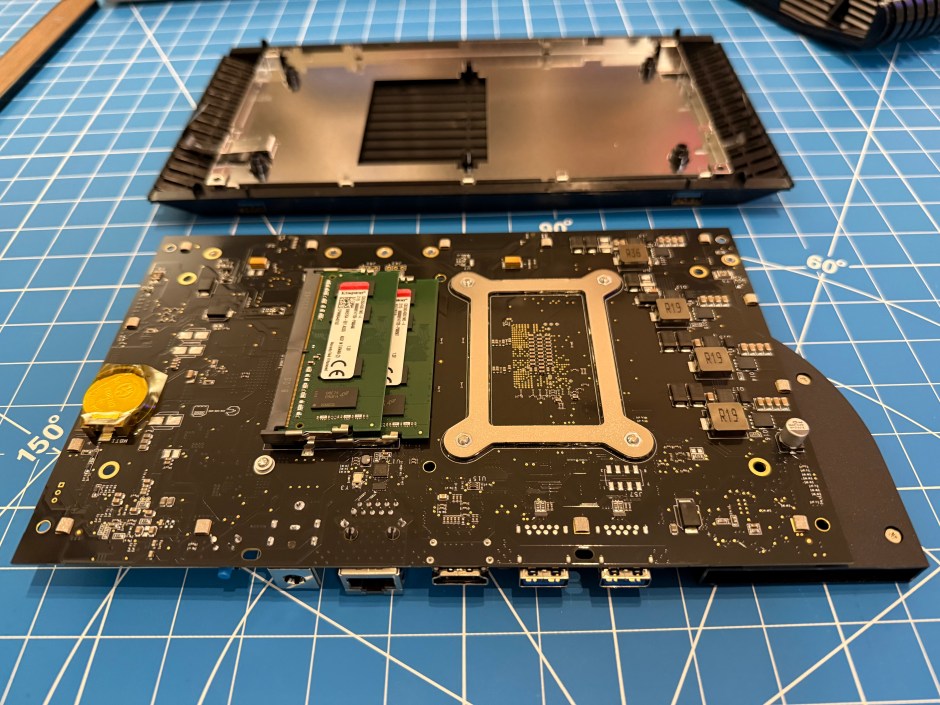
Step 10: Replace the original 4GB RAM modules with your upgrades

If you have ever added RAM modules in a laptop, this will work exactly the same. The slots are keyed, so they can only go in one way. Just make sure they are seated well into the slot and press down to lock them in.
In my case, two 16GB modules from OWC6 for a total of 32GB, which is the maximum allowed by the Atari VCS 800.
Step 12: Flip the motherboard over to the front again, unplug the CPU/GPU fan from J22, unscrew and remove the heatsink + fan assembly
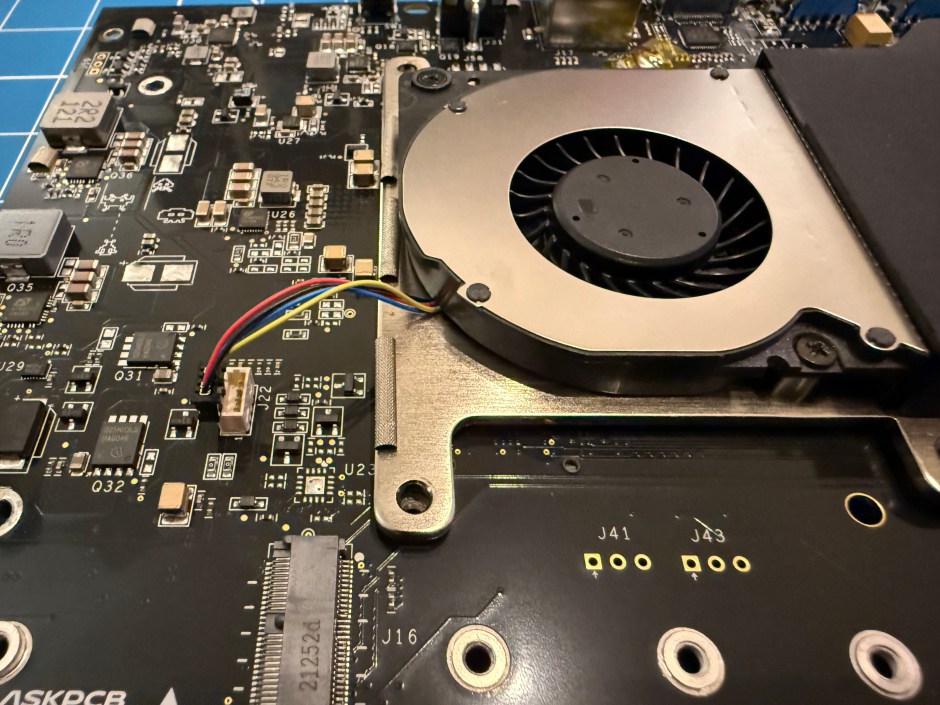
Step 13: Replace the original thermal pad from the CPU/GPU with thermal paste

Thermal paste will fill the microscopic gaps in the heatsink and the CPU/GPU, improving cooling for the system.
In my case, I used some Thermal Grizzly paste7 and it’s working very well so far.
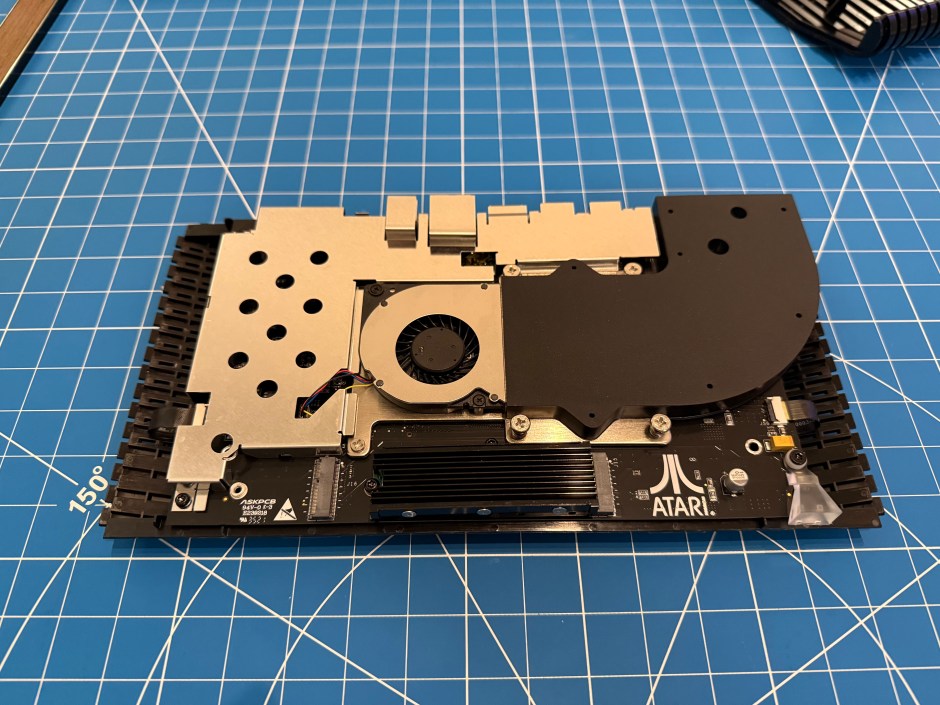
Step 14: Screw the heatsink + fan assembly back into the motherboard, reconnect the CPU/GPU fan to port J22, and plug your M.2 SATA SSD into slot J15
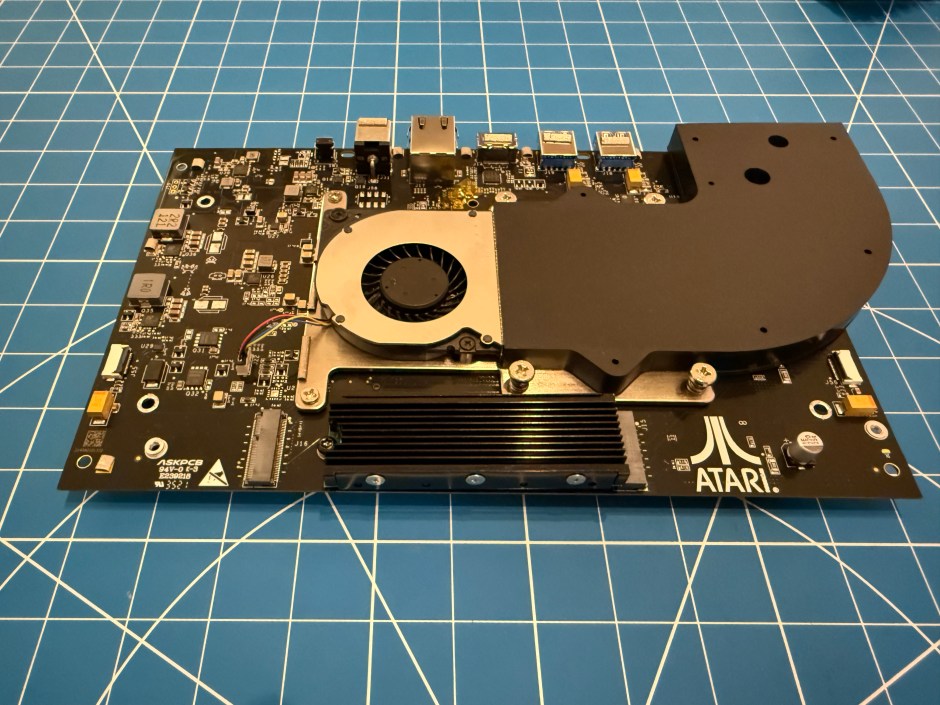
For my system, I went with a Western Digital 250GB Blue M.2 SATA SSD8. I plan on mostly using my Atari VCS 800 with Batocera for retro gaming, so 250GB will be plenty of space.
For the SSD heatsink, I just picked up a generic one on Amazon9 and so far it is working well.
NOTE: It seems that most Atari VCS 800 systems include a screw to secure the M.2 SATA SSD to the motherboard. If yours does not have this screw, please do not plug your M.2 SATA SSD into the system until you have a screw to secure the drive.
Step 15: Screw the motherboard back into the bottom of the Atari VCS 800 case, reconnect the front USB port cables to the motherboard plugs J55 and J56, and then reattach the shielding
Don’t forget to reconnect the front USB port cables before reattaching the shielding, so you have enough space to clamp the ribbon down with your fingers.
Step 16: Reconnect the WiFi card to the motherboard

Remember, the WiFi antennas are short, so you will need to bring back whatever you used to prop the top of the case against before. Then you can seat the WiFi card into slot J16 and screw it back down.
IMPORTANT: As in Step 4 when you opened the case, take equal care when closing the case to avoid snapping the WiFi antennas. Close the case, this time front-to-back, like a book or clamshell, where the hinge at the front of the case.
As before, I stood the top and bottom halves of the case like an “L” – propping the top half against a stack of books – to plug in and screw down the WiFi card, and then shut the case like a book.
Step 17: Flip the VCS 800 over and screw the top and bottom of the Atari’s case together again, reattach the rubber feet, and snap the front and rear panels back onto the case

With the physical hardware upgrades completed, now we need to configure the Atari VCS 800 to take advantage of everything we’ve done.
For that we have to reconnect that Atari VCS 800 to power, HDMI and the keyboard.
Step 18: Allocate a portion of the system RAM to the GPU
- Turn on the Atari VCS 800 and press the ESC key on the keyboard until you get to the BIOS screen
- From the BIOS menu, select “Setup Utility“
- From Setup Utility, go to the AMD CBS menu and select “NB10 Common Settings“
- From the NB10 Common Settings menu, select “GFX Configuration“
- From the Integrated Graphics Controller menu, open the IGC menu and then select “Forces“
- Open the UMA Mode menu and select “UMA_SPECIFIED“
- Open the UMA Frame Buffer menu and select “4G“, which will allocate 4GB of your upgraded system RAM for exclusive use by the GPU
- Press the F10 key on the keyboard to Save & Exit your changes
- Allow the system to restart, boot into Atari OS for the first time, and move on to Step 19
For playing Atari OS games, MAME, Batocera, and the like, 4GB of RAM should be plenty for both 1080P and 4k gaming, and that’s how I plan on using my Atari VCS 800. Please note: if you intend on allocating more than 4GB of RAM to the GPU, there are additional BIOS settings that you will need to research and configure beyond what is covered in this guide.
Step 19: Boot to Atari OS, setup your Atari account, and format the SSD
- Plug your Atari Modern Controller into the Atari VCS 800 using the included USB cable
- The system is very likely to download and install updates to both the BIOS and OS, and reboot at least once
- Follow the on-screen instructions to create your Atari account and passcode
- Once you are at the Atari main menu screen, use the Atari Modern Controller to select “Settings“
- From the settings menu, select “Storage“
- From the Storage menu, select your SSD and format it
- (Recommended, but optional) Plug your Atari Classic Controller into the system with its included USB cable. Using the Atari Modern Controller to go to the System Menu. From the System menu, select Devices and then select “Update Controllers”. If there is a firmware update for your controller(s), select “Update now”, then wait for the update to download and install.
In my case, I will be installing Linux Mint and Batocera on the SSD, and almost exclusively boot into Batocera. If your plans are the same or similar, we have one more step (#20 below) to complete for this stage of the project. Both the Atari Classic Controller and Modern Controller only remember a single Bluetooth connection, so it’s best to set up Bluetooth for the controllers later in Batocera.
If you do not plan on installing another Operating System or Batocera onto the SSD, then you may skip the next – and last – step of the Atari VCS 800 hardware upgrades. If this is so, congratulations! You have completed the hardware upgrades to your Atari VCS 800 and are ready to connect your controllers via Bluetooth to start gaming on Atari OS.
Step 20: Prepare the Atari VCS 800 to boot to the SSD and for multi-boot
- After completing #7 in Step 19, use Atari Modern Controller to select Power, and select “Restart”
- Press the ESC key on the keyboard until you get to the BIOS screen
- From the BIOS menu, select “Setup Utility“
- From the Setup Utility menu, go to the AMD CBS menu and select “FCH Common Options“
- From the FCH Common Options menu, open the eMMC Options menu, open the eMMC/SD Configuration option and select “DISABLED“
- Press the ESC key on the keyboard to back out of AMD CBS menu, and go to Boot menu
- From the Boot menu, open Boot Order Options, and select “(b) USB -> SSD -> eMMC“
This will force the Atari VCS 800 to boot from any connected USB Flash Drive first. If no USB Flash Drive is connected, then the system will boot from the SSD. If the SSD has no bootable partition, the system will eventually boot into Atari OS on its original 32GB eMMC drive. - Press the F10 key on the keyboard to Save & Exit your changes
If you have made it this far, congratulations! Now your Atari VCS 800 is ready for the next stage of the project; installing Linux Mint and Batocera.


